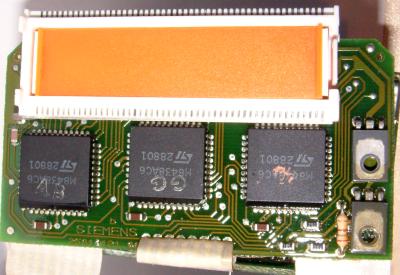
Now you have your OBC in bits (see part 1), how do you go about changing the stock orange backlight to something a bit more modern? There are two components to the obc backlighting – the LCD backlight, and the keypad backlight.
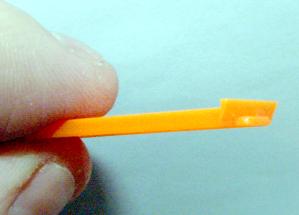
At the end of part 1 of the diassembly instructions, you removed the LCD display itself (and I hope you put it somewhere safe, if you break it it’s game over). If you look at the connector where the LCD used to go you will see that there is an orange diffuser clipped into place. This is the reason the display lights up orange.
The diffuser is clipped at each end to a metal box in the middle of the LCD connector. It can be unclipped by carefully slipping a knife inbetween the filter and the connector at the centre of one of the long edges, and lifting it up in the middle. This will bend the diffuser, unclipping the ends. The connector will now look something like this.
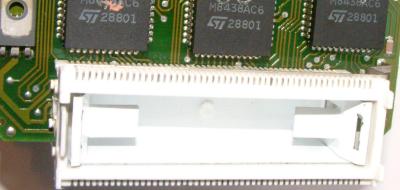
…note the clips on each end of the diffuser, they clip into the metal light box
The lightbox itself is made of metal to withstand the constant heat from the two bulbs. It has two metal tabs to cover the bulbs to prevent the display from having two bright spots where the bulbs are.
I can think of a few ways to change the colour of the display. First you could try leaving the orange filter out, and using coloured bulbs. Second, you could make a small circuit board to fit in the light box, holding LEDs of the appropriate colour. It would be a good idea to paint the component side of the circuit board white before soldering in the LEDs. Third, you could make your own replacement filter with coloured gels.
My preference would be to use a circuit board populated with LEDs, but blue LEDs (which I think would look best) are still amazingly expensive. Like about £3.50 each.
What about converting the display to an inverse (black on orange) display? Well, it would be easy, if the polarising filter had not been glued to the front of the LCD! If by some fluke yours does happen to be detached, you can invert your display by flipping the filter over. Whatever you do don’t try to peel off the filter, you will only break it (the filter and the LCD).
How about the backlight for the keyboard? Well if anything you have an even harder job on your hands with this one. The light guide is in two parts, a part on the front side of the circuit board, and a part behind into which the bulb shines. The front light guide is fine, but the rear one has been tinted in the factory to produce the orange colour. You can clearly see it in the following photo.
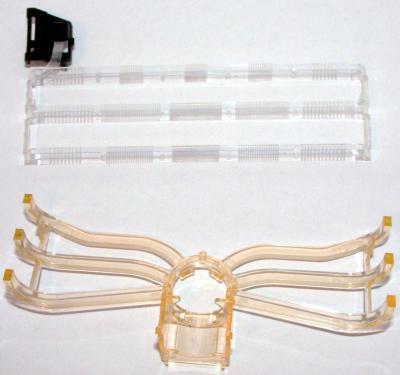
The only solution I can think of to this problem is to dispense with the rear light guide completely, and use LEDs for instead. You will need 6 very small LEDs to illuminate the front light guide, probably surface mount compoents are the only ones small enough. The problem is that the light guide finishes extremely close to the sides of the case, in fact the 6 extremities of the light guide can be seen through cutouts in the side of the case.
In the light (pun intended!) of all these problems I decided to leave it all orange for now.