Many of the switches in your car will illuminate when theheadlights are switched on, but most of them use tiny incandescentlight bulbs to provide the illumination. The problem with these bulbsis that they eventually burn themselves out. The repair procedure I’mgoing to describe here is to replace a burned out lamp with an LED. You will need ————-
- Orange LEDs
- Resistors
The value of the resistor needed for the LED can be calculated from the specifications of the LED you buy. My LED had a forward voltage drop Vf of 1.2v, and a nominal forward current If of 20mA. The circuit required is very simple. First of all assume your circuit will be supplied with 14v. The voltage drop required over the series resistor, in order to leave 1.2v for the LED, is 12.8v (14-1.2). Ohm’s law tells us that V = IR, that is to say, voltage = current × resistance. Plugging the values we know into the formula, we get:
V = IR (Voltage = Current × Resistance)
12.8 = 0.02 × R
R = 12.8 / 0.02
R = 640 Ω
The nearest common value to 640 Ω is 620 Ω, so that is what we will buy. Now, resistors come in different power ratings. How much power will our resistor need to dissipate?
P = IV (Power = Current × Voltage)
P = 0.02 × 12.8
P = 0.256 W
So a 1/4 watt resistor should be able to cope.
Installation
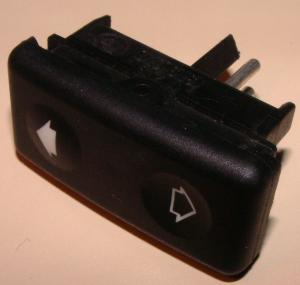
The switch here is the electric window switch from the left rear door of my car.
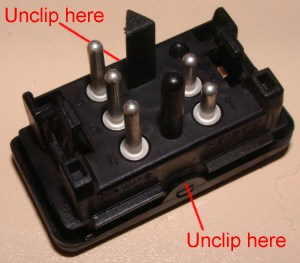
The front of the switch unclips from the back by easing it apart at the hinges.
The inside of the switch could do with a clean… I always use Super Servisol 10 Switch Cleaning Lubricant, although you could use isopropyl alcohol, which you can get from your local chemist.
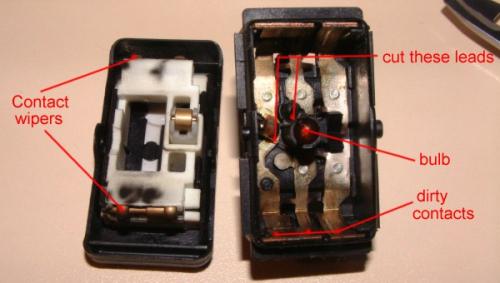
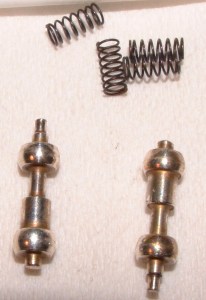
The contact wipers pull out from the front of the switch. Remove them and give them a clean. There are two small springs behind each wiper, be careful not to lose them.
The old bulb should be removed by cutting its leads. You may damage the switch if you try to de-solder it. Here is the bulb after removal:
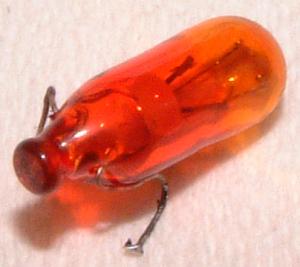
It is approximately 3.5mm diameter, 11mm long.
The next thing to do is note which pins of the switch were connected to the bulb. Bulbs can be connected either way round but an LED must be connected correctly or it won’t work. You need to go to the car with a multimeter, switch the headlights on (so the switch would be lit up if it was in place), and test the two pins to see their polarity. Make a note of which one is connected to B+ and which one is earth, you will need this information when you solder in the LED.
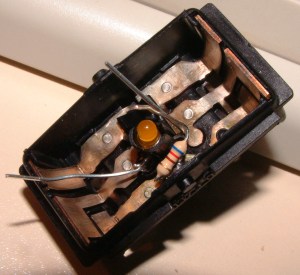
The LED and resistor need some preparation first. The leads will need trimming to fit both components in the body of the switch. The following picture shows the resistor with one leg soldered in place, and the LED in position but un-soldered. The other leg of the resistor has been bent so it is close to the LED leg ready for soldering. What isn’t clear in the picture is that the LED is sticking up about 5mm above the level of the top of the black tube it is mounted in.
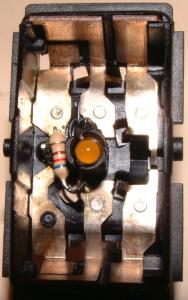
Now you are ready to connect up the LED. Solder one leg to the resistor, and the other to the pad on the switch. Cut the leads nice and short and bend them out of the way, and you should be left with something like this:
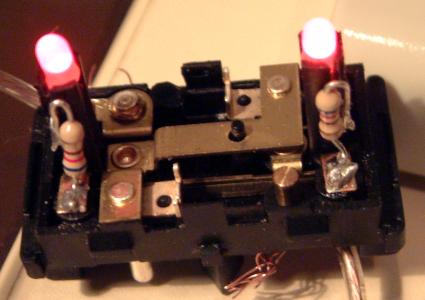
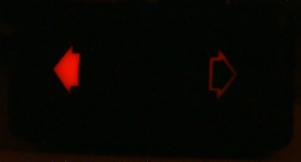
All that remains to be done now is to test it. If you’ve got a 12v power supply you would be advised to do that before you reassemble the switch, if not you’ll have to put it back together completely and test it in the car. Here is an extremely long exposure of the finished product, in a darkened room and powered by the 12v output of an old PC power supply:
I also replaced both burnt out bulbs in my rear blind switch with LEDs, here’s a picture of it being tested before reassembly: