I’m going to document this because it took me ages to work out, but in the end it turned out to be quite easy.
In
Rails there is a useful thing called
‘flash’.
Flash is a component which is automatically available in every view. Controller
classes can insert a message into the flash object, and when it renders the
view it can display the message. The great thing is that by default the message
exists in the flash for two requests. This is so that the current request can
be terminated with a browser redirect, and when the browser follows the
redirect the flash message will be there waiting for it.
The way it works in ruby is quite simple. In a controller’s action method, you
just put a message into the flash object:
flash[:notice] = 'Logged in successfully'.t
Then in the view, usually in a common part of the layout on every page, you
put:
<% if self.flash[:error] -%>
<div class="error" id="error"><%= self.flash[:error]%></div>
<% end -%>
<% if self.flash[:notice] -%>
<div class="notice" id="notice"><%= self.flash[:notice] %></div>
<script type="text/javascript">new Effect.Highlight('notice', {duration: 2.0});</script>
<% end -%>
One of the reasons the flash object is so smart is that the messages you add to
it persist for two requests by default - the current request, and the next
request. This is so that when you set a flash message then issue a redirect,
the message is still there to be rendered when your browser follows the
redirect.
In order to implement this in Java, I’ve had to change things slightly. In the
expression language that Spring uses, you can only access bean properties, you
can’t call functions. So I can’t call flash.get(‘message’). In the application
I’m porting to Spring, I have message types ‘notice’ and ‘error’, so I’ve
hard-coded methods for them in my flash object.
Here’s the code for the Flash object:
package info.evansweb.spring.examples.flash;

import java.util.HashMap;
import java.util.Iterator;
import java.util.Map;

/**
 * Copyright 2007 Jon Evans, jon@springyweb.com
 *
 *  Licensed under the Apache License, Version 2.0 (the "License");
 *  you may not use this file except in compliance with the License.
 *  You may obtain a copy of the License at
 *
 *      http://www.apache.org/licenses/LICENSE-2.0
 *
 *  Unless required by applicable law or agreed to in writing, software
 *  distributed under the License is distributed on an "AS IS" BASIS,
 *  WITHOUT WARRANTIES OR CONDITIONS OF ANY KIND, either express or implied.
 *  See the License for the specific language governing permissions and
 *  limitations under the License.
 *
 * This class implements a Flash object for Spring MVC, inspired by the flash
 * object available to views in Rails (rubyonrails.org)
 *
 * @author Jon Evans, jon@springyweb.com
 *
 */
public class Flash {
  private static final String NOTICE = "notice";
  private static final String ERROR = "error";

  private Map<String, FlashEntry> data = new HashMap<String, FlashEntry>();

  public void clear() {
    this.data.clear();
  }

  public void decr() {
    Iterator<FlashEntry> it = data.values().iterator();
    while (it.hasNext()) {
      FlashEntry entry = it.next();
      int ttl = entry.decr();
      if (ttl <= 0) {
        it.remove();
      }
    }
  }

  /** Set an arbitrary key / value / ttl message */
  public void set(String key, String value, int ttl) {
    data.put(key, new FlashEntry(value, ttl));
  }
  /** Set an key / value message with default ttl message */
  public void set(String key, String value) {
    data.put(key, new FlashEntry(value));
  }
  /** Set a NOTICE message */
  public void set(String value) {
    data.put(NOTICE, new FlashEntry(value));
  }

  /** Set a message for the current request only */
  public void setCurrent(String key, String value) {
    data.put(key, new FlashEntry(value, 1));
  }
  /** Set a NOTICE message for the current request only */
  public void setCurrent(String value) {
    data.put(NOTICE, new FlashEntry(value, 1));
  }

  /** Set a NOTICE message with a ttl */
  public void setNotice(String value, int ttl) {
    data.put(NOTICE, new FlashEntry(value, ttl));
  }
  /** Set a NOTICE message with default ttl */
  public void setNotice(String value) {
    data.put(NOTICE, new FlashEntry(value));
  }
  /** Set an ERROR message with a ttl */
  public void setError(String value, int ttl) {
    data.put(ERROR, new FlashEntry(value, ttl));
  }
  /** Set an ERROR message with default ttl */
  public void setError(String value) {
    data.put(ERROR, new FlashEntry(value));
  }

  public String getValue(String key) {
    if (data.containsKey(key)) {
      return data.get(key).getValue();
    } else {
      return null;
    }
  }
  public String getNotice() {
    return getValue(NOTICE);
  }
  public String getError() {
    return getValue(ERROR);
  }

  public class FlashEntry {
    private String value;

    // Default ttl is 2, this request, and the following request
    private int ttl = 2;

    public FlashEntry(String value) {
      this.value = value;
    }

    public FlashEntry(String value, int ttl) {
      this(value);
      this.ttl = ttl;
    }

    public int getTTL() {
      return ttl;
    }
    public void setTTL(int ttl) {
      this.ttl = ttl;
    }

    public int decr() {
      return --ttl;
    }

    public String getValue() {
      return value;
    }
  }

  public String toString() {
    return "Flash [" + data.size() + " message(s)]";
  }
}
Next you need a component which runs at the conclusion of every request. This
component is responsible for decrementing the message counters in the flash
object:
package info.evansweb.spring.examples.flash;

import javax.servlet.http.HttpServletRequest;
import javax.servlet.http.HttpServletResponse;

import org.springframework.web.servlet.handler.HandlerInterceptorAdapter;

/**
 * Copyright 2007 Jon Evans, jon@springyweb.com
 *
 *  Licensed under the Apache License, Version 2.0 (the "License");
 *  you may not use this file except in compliance with the License.
 *  You may obtain a copy of the License at
 *
 *      http://www.apache.org/licenses/LICENSE-2.0
 *
 *  Unless required by applicable law or agreed to in writing, software
 *  distributed under the License is distributed on an "AS IS" BASIS,
 *  WITHOUT WARRANTIES OR CONDITIONS OF ANY KIND, either express or implied.
 *  See the License for the specific language governing permissions and
 *  limitations under the License.
 *
 * @author Jon Evans, jon@springyweb.com
 *
 */
public class FlashDecrementer extends HandlerInterceptorAdapter {

  private Flash flash;

  public void setFlash(Flash flash) {
    this.flash = flash;
  }

  public void decr() {
    if (flash!=null) {
      flash.decr();
    }
  }

  public void afterCompletion(HttpServletRequest request,
      HttpServletResponse response, Object handler, Exception exception)
      throws Exception {
    decr();
  }
}
It gets wired into the Spring framework in your applicationContext.xml:
  <bean id="flash" class="info.evansweb.spring.examples.flash.Flash"
    scope="session">
    <!-- Google for aop:scoped-proxy if you don't understand why this is here  -->
    <aop:scoped-proxy />
  </bean>

  <bean id="flashDecrementer"
    class="info.evansweb.spring.examples.flash.FlashDecrementer">
    <property name="flash" ref="flash" />
  </bean>
and in the servlet xml file:
  <bean id="handlerMapping"
    class="org.springframework.web.servlet.mvc.annotation.DefaultAnnotationHandlerMapping">
    <property name="interceptors">
      <list>
        <!-- This line makes sure the flash gets decremented
          after every request -->
        <ref bean="flashDecrementer" />
      </list>
    </property>
  </bean>

  <bean
    class="org.springframework.web.servlet.view.InternalResourceViewResolver">
    <property name="prefix" value="/WEB-INF/jsp/" />
    <property name="suffix" value=".jsp" />
    <property name="viewClass"
      value="org.springframework.web.servlet.view.JstlView" />
    <property name="attributes">
      <map>
        <!-- This is the line that makes the flash object available in
          every view -->
        <entry key="flash" value-ref="flash" />
      </map>
    </property>
  </bean>
Now, it’s really easy to add a message to the flash from your controller. First
you make sure the flash object is available:
  @Autowired
  private Flash flash;
Then in a controller method you just add your message:
  @RequestMapping("/login.do")
  public ModelAndView login() {
    // Do your login stuff here...
    flash.setNotice("Welcome back!");

    ModelAndView mav = new ModelAndView("redirect:/home.do");
    return mav;
  }
And in your views you just include a simple flash.jsp file containing something
like this:
<c:if test="${flash.error != null}"></c:if>
  <div class="error" id="error">${flash.error}</div>
</c:if>
<c:if test="${flash.notice != null}">
  <div class="notice" id="notice">${flash.notice}</div>
</c:if>
I’ve built an example web application and packaged it up. Once unzipped you can
run it straight away with “mvn jetty:run” if you have maven2 installed. Here’s
the zipfile (only 13k!):
spring-flash-example.zip
Finally a shameless plug. I quit my full-time job at the end of November 2007
in order to become a freelance developer. I’m starting a new software
development business…
Updated 2024: The business ran successfully for nearly 10 years but I have
been back in full time employment since then - working for one of the companies
that I used to do freelance work for.

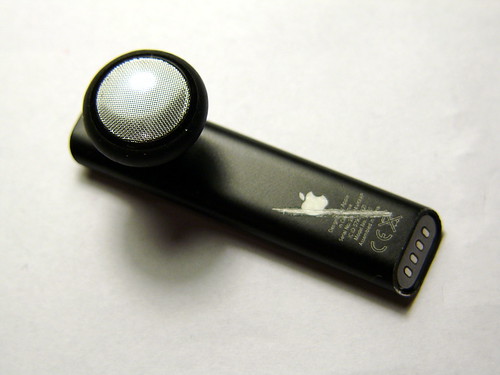
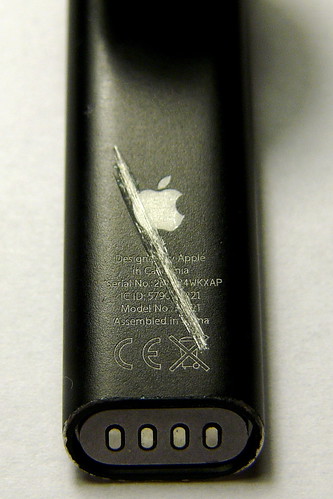
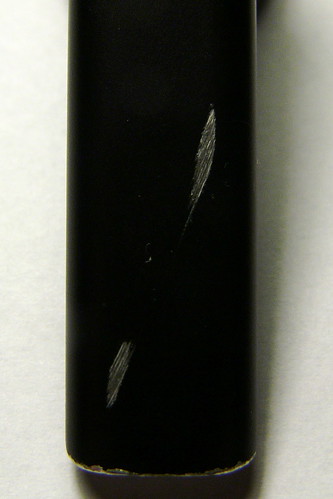
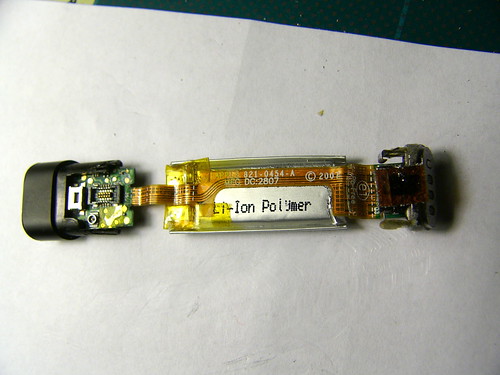
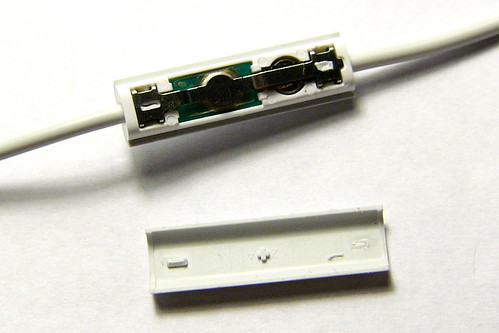 My bluetooth headset is still in a bad way. It sort of charges up, but the indicator flashes orange. If you hold the button to turn it on, it does the usual four rising tones but it is very scratchy and crackly. It’s also pretty beat up, as it came out of the pocket and rattled round the washing machine drum.
Here’s some pictures.
My bluetooth headset is still in a bad way. It sort of charges up, but the indicator flashes orange. If you hold the button to turn it on, it does the usual four rising tones but it is very scratchy and crackly. It’s also pretty beat up, as it came out of the pocket and rattled round the washing machine drum.
Here’s some pictures.